

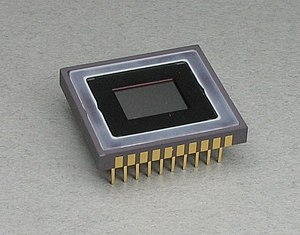
 For those of you new to digital photography or photography in general you may be asking yourselves "what are ISO camera settings and how do I use them?" In photography, ISO literally stands for International Standards Organization and refers to the speed of film whether black and white or color (there is more to it than that but it gets to technical for what I want to cover). The system was originally developed during the golden ages of film photography (back in the days of ASA film standards) and has managed to find its way into digital photography today. ISO also refers to the sensitivity of film and for digital cameras refers to how sensitive to light the image sensor is. By far the most popular and commonly used ISO would be 100 ISO which is ideal for well light environments and normal lighting situations. In fact, most people take their photos using this ISO setting. In the past photographers had to purchase specific ISO rated films and change between them based on their lighting situation, thankfully today with the aid of modern technology and the development of digital cameras, ISO settings can be changed with the push of a button without the hassle or need of changing film.
 So why are ISO settings so IMPORTANT anyway? ISO or film speed is an integral part of determining the exposure of a photograph, more specifically the goal of each photographers photos. In order for a photographer to obtain perfect or near-perfect (lets say desired) exposure (what results in a desired photo outcome), he/she must take into consideration the four following variables:
- ISO/Film Speed
- Lighting (environmental or artificial)
- Aperture/f-stops/f-numbers
- Shutter Speed
How do I know when to change the ISO setting? Changes to your cameras ISO setting are done based on certain criteria that pertain to the subject you are trying to shoot. One factor that is important is lighting, knowing what kind of lighting your shooting in will allow you to determine whether or not you need to bump up your ISO or lower it. In low lighting situations such as: indoor events (birthdays, weddings, churches, museums, plays), sporting events, night photography, etc. setting your cameras ISO setting to say 800 or 1600 ISO will allow you to take photos at lower shutter speeds (i.e.1/30th s), without the need for flash. Often times in many of these situations flash is not permitted or allow and so higher ISO speeds (i.e. 400, 800, 1600) are ideal and a must. Another benefit of using higher ISO speeds is when your are taking night photography and you do not have a tripod. One of the biggest drawbacks to high ISO speeds is grain which appears in photos at settings above 600 ISO and up, also the photos tend to lose quality as well. The quickest way to combat grainy images is to lower the ISO to somewhere from 50 - 100 ISO where the image quality is the considered the best, however these low ISO settings work best in well light environments (i.e. outdoors and direct sunlight).
How to change the ISO Setting on digital cameras:
Most digital cameras have a button that is already programmed and labeled (ISO), for the photographer. All that is required usually is to press and hold the button while a dial or directional button is moved left to right or up and down. The change in ISO setting can be viewed on the LCD screen of the camera. Since each camera is different it is best to review your cameras manual.
Most cameras also come with the option to turn on what is called AUTO ISO, this allows the camera to take control and select the best ISO setting for the image sensor. when AUTO ISO has been selected the word AUTO ISO will usually appear in the viewfinder or LCD screen. just like selecting Auto ISO from your cameras internal menu options, most cameras come with built in pre-set modes that do most of the work in general (I don't really recommend using these modes since they take most of the control away from the photographer). In these modes ISO is set to Auto, these preset modes are available through a program mode dial on the cameras body.
Determining which ISO setting is ideal for the environment you will shoot in is something that requires like most other things, practice, but with time will become secondnature to you.
If you find that your are still confused after reading this article then I encourage you to check out some of these sites that talk about ISO and film speed.
http://digital-photography-school.com/iso-settings
http://www.cameratown.com/guides/iso.cfm
http://blog.webshots.com/?p=830


