

Thursday, December 24, 2009
A Digital Photographers Nightmare! - Welded Dust
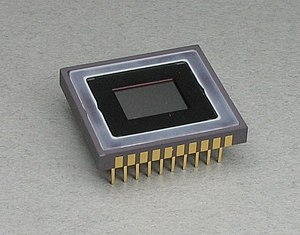
Most of you have been there before more often than not, for the rest of you, your day will come! I remember the day because I had just come back from taking photos in Chosica. I had run into the issue of dust on my low-pass filter which was showing up quite visible in my photos (in fact, to the point that it was ruining my photos). Since I had cleaned the filter before I decided to clean it again, so I grabbed my Giotto "Rocket" air blower bulb, unscrewed my lenses and began to blow air into the camera to dislodge any dust from the low-pass filter, and that's when the nightmare began!!!
 I currently live in Lima, Peru where in the past few days we have entered into summer, thus there has been more humidity in the air. What started out as a few pesky specs of dust turned out to be several specs of dust on my low-pass filter! I tried blowing several times and even employed extra muscle in a desperate attempt to remove the dust, but my efforts were in vain for the dust remained on the filter as if mocking me. RAGE was my emotion of the day, the kind of frustration and anger that can bring a grown man to tears. The moisture from the air had caused all the dust coupled with the force of the blower bulb air to fuse or "weld" (a commonly used term in photography) the dust to my filter.
 Realizing my dilemma I began contemplating my options, my father in his moment of expertise offered to clean it off using a Q-tip to which I SCREAMED "NOOOOOOOOOOOOOOOOOOOOOO!!!!!!!" Accepting defeat I decided that I had neither the tools nor the expertise to tackle my problem, so I decided my only other option was to send it to a professional. I grabbed the phonebook and began searching for a technician in Lima. A few minutes later I found one located in the district of Miraflores, I called and asked how much it would cost to clean the filter and was given a price of S/. 150 (Peruvian New SOL) which is equivalent to $50 USD. Not bad considering how much it costs in the states to have it sent away to a professional for maintenence. Now I would be lying if I told you I wasn't scared and worried at the mere thought of leaving my camera in the hands of a stranger (professional or not), especially since that camera is a representation of all my hard work spent in order to obtain it.
Like a frightened parent I decided to leave my child in the hands of a professional. I went with my family to Miraflores and headed over to the 3rd block of Av. Diez Canseco (#316) where the little camera shop was located. I met with the lead technician who gave me a play by play of how he intended to fix the problem. The technician stated that in order to clean the low-pass filter he was going to have take the camera apart (YIKES!). I left the technician with my camera and walked away unsure if I would see my camera again (in working order that is).
The next day I returned to the shop only to find my camera in perfect working condition, I was ecstatic, to say the least. I felt my faith restored and was more than glad to pay the maintenence fee. I would definately recommend this camera shop for those who lack the expertise or stomachs to clean their low-pass filters.
It is important to note that there do exist several products and methods for cleaning and removing dust and other foriegn matter from the low-pass filter of your CCD. If you do find yourself in a situation that requires you to clean inside your camera you might want to consider the following link. This website provides a TON of useful advice and tips, along with several products for those interested in cleaning their filter. I highly recommend you give it a read.
Here is the link: The website is called www.cleaningdigitalcameras.com
Monday, December 14, 2009
Underwater Digital Photography
Have you ever been interested in how photographers take underwater digital photos without totally ruining their camera, I know I did! Until just a few months ago I had no idea how photographers took photos underwater or what type of gear they used to get the job done. I guess in my mind I picture so complicated device that probably cost thousands of dollars just to obtain.
Apparently when photographers want to take photos underwater they rely on special camera housing instruments that are 3 times the size of the camera itself and when used properly are completely waterproof. I have seen many different models of underwater photography gear in the past but never really saw any in action let alone used one (they are pretty expensive FYI). Yesterday while surfing the net I visited Chase Jarvis's blog (a professional photographer) and saw an awesome video that he posted which show's him and his friends testing out an underwater photography device in a backyard pool. The end results are amazing I definitely encourage you to check out his video here:
Apparently when photographers want to take photos underwater they rely on special camera housing instruments that are 3 times the size of the camera itself and when used properly are completely waterproof. I have seen many different models of underwater photography gear in the past but never really saw any in action let alone used one (they are pretty expensive FYI). Yesterday while surfing the net I visited Chase Jarvis's blog (a professional photographer) and saw an awesome video that he posted which show's him and his friends testing out an underwater photography device in a backyard pool. The end results are amazing I definitely encourage you to check out his video here:
Wednesday, December 9, 2009
What Are ISO Camera Settings and How Do You Use Them?
 For those of you new to digital photography or photography in general you may be asking yourselves "what are ISO camera settings and how do I use them?" In photography, ISO literally stands for International Standards Organization and refers to the speed of film whether black and white or color (there is more to it than that but it gets to technical for what I want to cover). The system was originally developed during the golden ages of film photography (back in the days of ASA film standards) and has managed to find its way into digital photography today. ISO also refers to the sensitivity of film and for digital cameras refers to how sensitive to light the image sensor is. By far the most popular and commonly used ISO would be 100 ISO which is ideal for well light environments and normal lighting situations. In fact, most people take their photos using this ISO setting. In the past photographers had to purchase specific ISO rated films and change between them based on their lighting situation, thankfully today with the aid of modern technology and the development of digital cameras, ISO settings can be changed with the push of a button without the hassle or need of changing film.
 So why are ISO settings so IMPORTANT anyway? ISO or film speed is an integral part of determining the exposure of a photograph, more specifically the goal of each photographers photos. In order for a photographer to obtain perfect or near-perfect (lets say desired) exposure (what results in a desired photo outcome), he/she must take into consideration the four following variables:
- ISO/Film Speed
- Lighting (environmental or artificial)
- Aperture/f-stops/f-numbers
- Shutter Speed
How do I know when to change the ISO setting? Changes to your cameras ISO setting are done based on certain criteria that pertain to the subject you are trying to shoot. One factor that is important is lighting, knowing what kind of lighting your shooting in will allow you to determine whether or not you need to bump up your ISO or lower it. In low lighting situations such as: indoor events (birthdays, weddings, churches, museums, plays), sporting events, night photography, etc. setting your cameras ISO setting to say 800 or 1600 ISO will allow you to take photos at lower shutter speeds (i.e.1/30th s), without the need for flash. Often times in many of these situations flash is not permitted or allow and so higher ISO speeds (i.e. 400, 800, 1600) are ideal and a must. Another benefit of using higher ISO speeds is when your are taking night photography and you do not have a tripod. One of the biggest drawbacks to high ISO speeds is grain which appears in photos at settings above 600 ISO and up, also the photos tend to lose quality as well. The quickest way to combat grainy images is to lower the ISO to somewhere from 50 - 100 ISO where the image quality is the considered the best, however these low ISO settings work best in well light environments (i.e. outdoors and direct sunlight).
How to change the ISO Setting on digital cameras:
Most digital cameras have a button that is already programmed and labeled (ISO), for the photographer. All that is required usually is to press and hold the button while a dial or directional button is moved left to right or up and down. The change in ISO setting can be viewed on the LCD screen of the camera. Since each camera is different it is best to review your cameras manual.
Most cameras also come with the option to turn on what is called AUTO ISO, this allows the camera to take control and select the best ISO setting for the image sensor. when AUTO ISO has been selected the word AUTO ISO will usually appear in the viewfinder or LCD screen. just like selecting Auto ISO from your cameras internal menu options, most cameras come with built in pre-set modes that do most of the work in general (I don't really recommend using these modes since they take most of the control away from the photographer). In these modes ISO is set to Auto, these preset modes are available through a program mode dial on the cameras body.
Determining which ISO setting is ideal for the environment you will shoot in is something that requires like most other things, practice, but with time will become secondnature to you.
If you find that your are still confused after reading this article then I encourage you to check out some of these sites that talk about ISO and film speed.
http://digital-photography-school.com/iso-settings
http://www.cameratown.com/guides/iso.cfm
http://blog.webshots.com/?p=830